1. 기능 구현
- 화면에 이미지를 띄우고(ImageView) 버튼을 하나 생성
- 버튼 클릭 시, 이미지 변경후, 메세지를 띄워보자
2. Android Studio에서 기본 프로젝트(with empty activity) 생성하자!
생성시 'Empty Activity'로 기본 생성
3. ViewBinding 사용을 위한 build.gradle 설정
  android {
          // 뷰 바인딩 옵션 활성화
          viewBinding {
              enabled = true
          }
      }
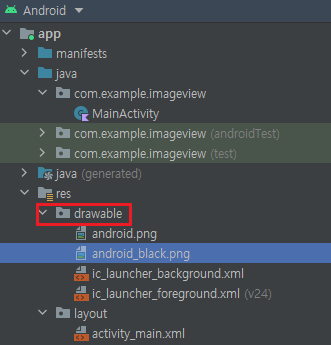
4. 변경 전/후 이미지 2개를 프로젝트에 추가
프로젝트에 사용될 이미지 2개를 추가해보자
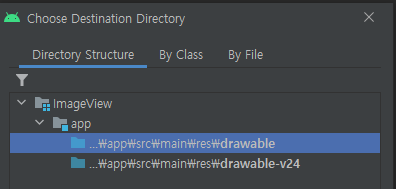
이미지 복사 후, resource 폴더안의 drawable 클릭해 Ctrl+V 로 쉽게 넣을 수 있다.
Ctrl+V 를 하면 다음과 같은 창이 뜨는데 첫번째인 drawable 을 선택하도록 하자.
5. activity_main.xml
ImageView 만들기 : 이미지 경로와 파일 이름을 정확히 확인해서 적어두자. (app:srcCompat="@drawable/android")
Button 만들기 : 1. 이미지 변경, 2. 토스트 메세지를 실행을 위한 버튼을 만들자.
<?xml version="1.0" encoding="utf-8"?>
<androidx.constraintlayout.widget.ConstraintLayout
    xmlns:android="http://schemas.android.com/apk/res/android"
    xmlns:app="http://schemas.android.com/apk/res-auto"
    xmlns:tools="http://schemas.android.com/tools"
    android:layout_width="match_parent"
    android:layout_height="match_parent"
    tools:context=".MainActivity">


    <ImageView
        android:id="@+id/iv_profile"
        android:layout_width="200dp"
        android:layout_height="200dp"
        app:layout_constraintBottom_toBottomOf="parent"
        app:layout_constraintEnd_toEndOf="parent"
        app:layout_constraintStart_toStartOf="parent"
        app:layout_constraintTop_toTopOf="parent"
        app:srcCompat="@drawable/android" />

    <androidx.appcompat.widget.AppCompatButton
        android:id="@+id/btn_toast"
        android:layout_width="wrap_content"
        android:layout_height="wrap_content"
        android:text="토스트 메세지"
        app:layout_constraintBottom_toBottomOf="parent"
        app:layout_constraintEnd_toEndOf="parent"
        app:layout_constraintStart_toStartOf="parent"
        app:layout_constraintTop_toBottomOf="@+id/iv_profile" />

</androidx.constraintlayout.widget.ConstraintLayout>
6. MainActivity.kt
만들어 놓은 Button 에 setOnClickListener 안에서 수행문 작성
setImageResource() : ImageView의 이미지를 새롭게 set
Toast.makeText(this@MainActivity,"버튼이 클릭되었습니다.", Toast.LENGTH_SHORT).show()
- Toast.LENGTH_SHORT : 메세지가 화면에 보여지는 시간으로 약 2초
- Toast.LENGTH_LONG : 약 4초 정도가 되겠다.
class MainActivity : AppCompatActivity() {

    private var mBinding:ActivityMainBinding? = null
    private val binding get() = mBinding!!

    override fun onCreate(savedInstanceState: Bundle?) {
        super.onCreate(savedInstanceState)
        //setContentView(R.layout.activity_main)

        mBinding = ActivityMainBinding.inflate(layoutInflater)
        setContentView(binding.root)

        binding.btnToast.setOnClickListener {
            binding.ivProfile.setImageResource(R.drawable.android_black)
            Toast.makeText(this@MainActivity,"버튼이 클릭되었습니다.", Toast.LENGTH_SHORT).show()
        }

    }
}
7. 실행결과
버튼 클릭 시, "버튼이 클릭되었습니다." Toast 메세지와 함께 이미지가 변경되었다(android -> android_black)
Reference
'Android > Kotlin' 카테고리의 다른 글
| [Android, Kotlin] Navigation View (0) | 2022.04.20 |
|---|---|
| [Android, Kotlin] ListView (0) | 2022.04.19 |
| [Android, Kotlin] drawable, drawable-v24 (0) | 2022.04.19 |
| [Android, Kotlin] Intent 로 Activity 화면전환 (0) | 2022.04.19 |
| [Android, Kotlin] 뷰 바인딩 (view Binding) (0) | 2022.04.18 |